• Link to X
  • Link to Facebook
  • Link to Instagram
  • Home
  • About
+47 95 44 46 62
Cody Duncan Photography
  • Portfolio
  • Ebooks
  • Motion
  • Travel
    • STORIES
      • Lofoten’s Mountains of Summer
      • Lofoten Autumn Nights
      • Lofoten Winter Journeys
      • Kungsleden Trail Sweden
      • Baltic Gold
    • GUIDES
      • Norway – Besseggen Ridge
      • Sweden – Kungsleden Trail
    • FESTIVALS
      • Germany – Pottenstein – Ewige Anbetung Fire Festival
    • GEAR
      • Backpacking Gear – 2015
  • Blog
  • Contact
  • Click to open the search input field Click to open the search input field Search
  • Menu Menu

Camera Gear for European Backpacking Trip
September 14, 2011/0 Comments/in Lofoten Islands, Tips and Tricks, Travel, Updates/by Cody

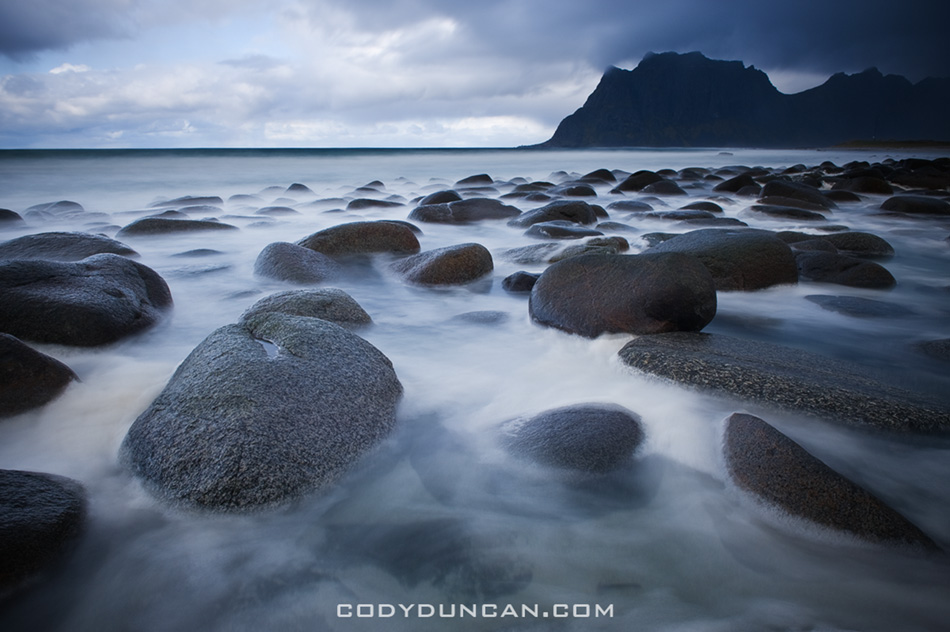
Utakleiv, Lofoten Islands, Norway

Photo: Utakleiv, Lofoten Islands, Norway

Yesterday I wrote about my backpacking gear for my next Europe trip.  Today is a bit of my thoughts about the camera gear that I’ll carry.  My overall ideal is to travel as light as possible, while still having enough tools to get the shot.  It is something I struggle with and am not perfect at.  I find myself wanting to take an extra lens ‘just in case I might need it,’ even though most times I wont.  Do I need a 50mm 1.4 for low light? Do I need an 70-200mm if I see some cool animal?  Yes and no.  I could easily end up carrying so much that I’ll never make it out into the wilderness to see that animal, or I’m too tired to keep walking around the streets of the old town for that nice evening light.  I need to accept the idea that I don’t need to, and can’t, take photos of everything.
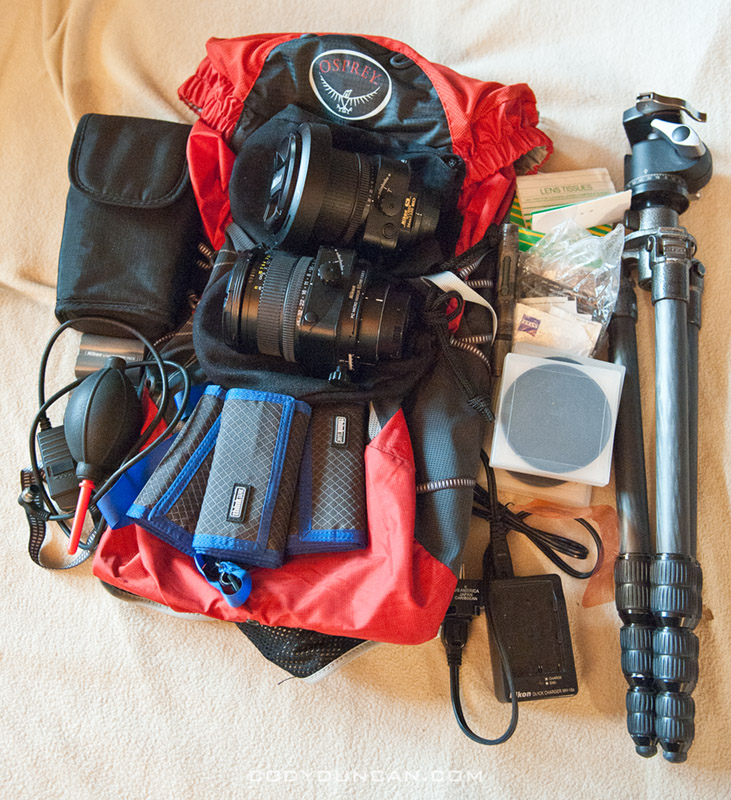
Camera: Nikon d700
24-70 f2.8 lens
24 f3.5 tilt-shift lens
85 f2.8 tilt-shift lens
SB-800 strobe
Neutral Density filters: 6 stop B&W, 10 stop B&W
Polarizing filter
UV Filter
Flash Cards: about 120GB
Cable release
Lens pen
Battery charger
Zeiss lens wipes
Lens tissue

I’m trying to keep my gear to a minimum on this trip.  I’m not really an ultra-wide shooter, so 24mm on full fame is generally wide enough for me.  I’m also not bringing a telephoto either, as it’s just heavy and I tent not to use it all that often anyhow.  Will I miss some shots by not having everything from 14mm to 200mm? Yes, not doubt.  It is simply the trade off that must be made.  If it was a shorter trip to one specific location, I might take a bit more, but for traveling for 2.5 months, less is better after a while.

Some might wonder why I’m taking the 24mm tilt-shift when I already have something at 24mm.  Mostly this is personal preference in that I’ve come to find 2/3 format to have something missing.  So with the tilt-shift I can shoot square or pano format with relative ease and not also have to carry special pano gear.  And by shifting the 24mm t/s, I can get a bit wider if I need to.  And it is also helpful for a bit of perspective control while shooting in narrow European streets and alleys.

The ND filters are absolutely necessary for the images I envision, most especially for the Lofoten Islands.  They bring out a presence and atmosphere of the islands that is otherwise difficult to find.  I used to keep UV filters on all my lenses, but I gave this up some time ago as I spent too much time taking them off and putting on the ND’s.  I do carry one though incase I need to shoot in heavy sea spray and I don’t want my lens to get overly soaked.  I’m not really sure why I carry a polarizer, as I hardly ever use it, but it comes in handy sometimes.  I generally don’t use microfiber lens cloths, as they just get too dirty and greasy after a while, especially if wiping salt water.  Disposable tissues in combination with the Zeiss disposable wipes is the best combination for crappy weather that I’ve found.  And I like clean lenses.

Tripod: Gitzo 1128 carbon fiber
Ballhead: Really Right Stuff BH-40,  plus L-plate on camera

I have a lighter tripod and ballhead, but as I’ll be in low light with bad weather a lot of the time, I need something a bit more sturdy.  If it was just a short trip, I would bring an even bigger tripod/ballhead, but I can’t really justify it for months on the road.  I’m a big fan of the Really Right Stuff gear, plus they’re just up the road from me.  The BH-40 is the best in function, strength and weight that I’ve found.

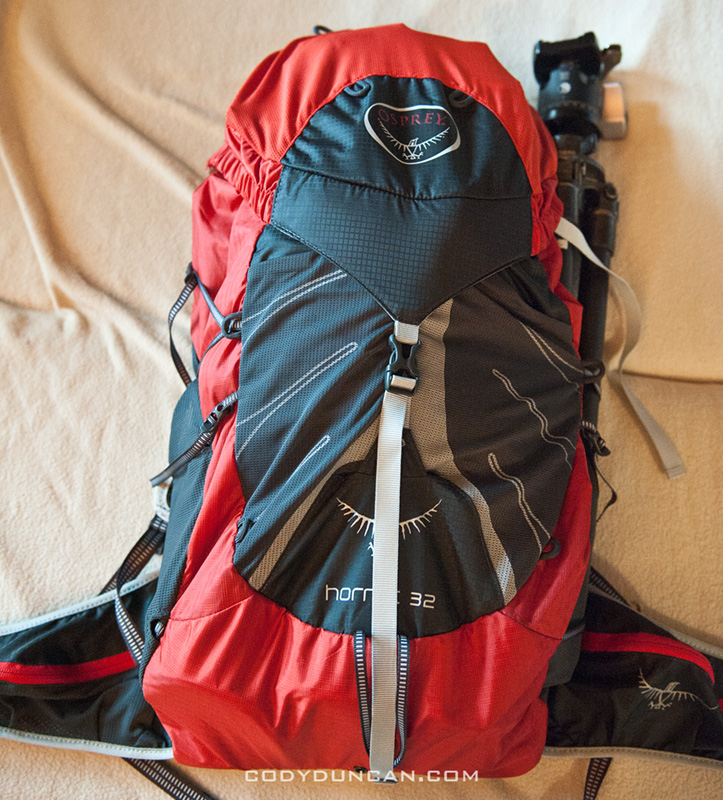
Backpack: Osprey Hornet 32  – 21 oz. (600 g.)

Yesterday I also mentioned my preference for using a normal hiking daypack over a camera specific backpack.  It’s not as convenient as a photo bag, and can take a bit longer to dig around for gear of find lenses, but at the end of the day, the benefits outweigh any drawbacks.  Or at least for me.  Again as with my lens selection, this is a purely person preference for how I like to travel.  This will be my first trip with the Osprey bag, but it feels pretty good loaded up.  Years ago, I had an old Mammut bag that was super light and perfect for travel.  It suffered 2.5 years of abuse before the bottom finally started giving out and I had to put it into retirement.  And I really put my gear through a lot.  While traveling my backpack is with me 24/7. It showers with me, sleeps with me, is in the hostel kitchen with me, sits next to me at the pub or on the train, and is always on my back while walking around or hiking.  My gear back basically becomes an extra body part.  For the last couple years I haven’t found a bag that was as good as the Mammut in overall function; most are either a bit on the heavy side or too flimsy.  The main problem with finding a light bag is that I need them to have a good hip belt.  The ultralight bags usually are lacking in this regard and the bags with decent hip belts tended to be a bit heavier.  The Osprey comes in pretty good in this area.  My only real critique is that the the top of the bag is some thin netting material, so I’ll have to take a bit of extra caution to keep things dry while in drizzly, rainy weather.   It could also have two Ice axe loops as well, so it probably wont be that good as a climbing bag.
 

Share:

  • Click to share on X (Opens in new window) X
  • Click to share on Facebook (Opens in new window) Facebook
  • Click to share on Reddit (Opens in new window) Reddit
  • Click to email a link to a friend (Opens in new window) Email
https://www.codyduncan.com/blogimages/2013/07/codyduncan-logo.png 0 0 Cody https://www.codyduncan.com/blogimages/2013/07/codyduncan-logo.png Cody2011-09-14 17:40:402011-09-14 17:43:49Camera Gear for European Backpacking Trip

Hiking and Travel gear for Lofoten Islands and European Backpacking

September 13, 2011/0 Comments/in hiking, Lofoten Islands, Tips and Tricks, Travel/by Cody

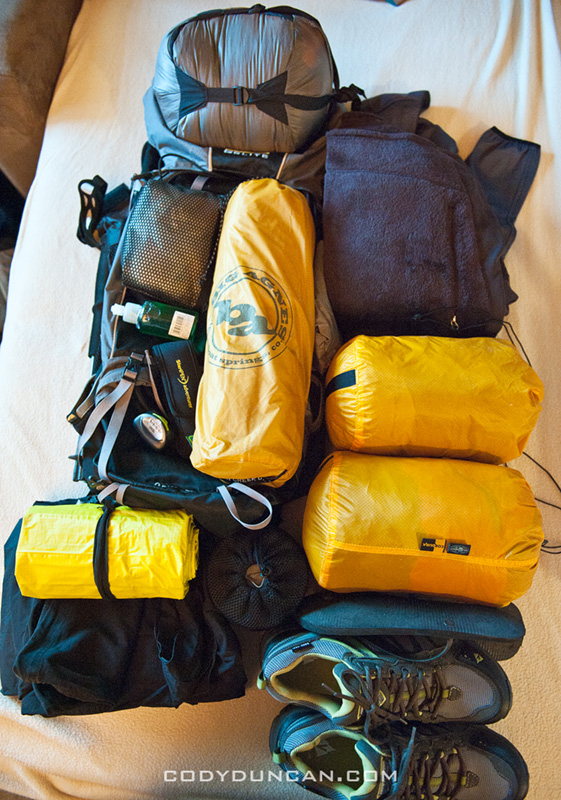
I sometimes get asked what gear I carry while traveling, so here’s a list of what I’m taking for 2 1/2 months of travel in Northern Europe from late September till mid December. Ideally I could carry a bit less and travel lighter, but having to carry gear both for camping in the Lofoten Islands and hanging out in Czech cities inevitably leads to some inefficiencies. Normally for a hiking trip, I would not carry anything that I don’t need every day. For mixing Norwegian camping and staying in hostels, this concept doesn’t work especially well. But here it is anyhow. Tomorrow I’ll write about camera gear.

Backpacking gear


Backpacking gear:
Backpack: Golite Odyssey, 90L (5490 in^3) – 47 oz.
Sleeping bag: REI Sub Kilo – 31 oz.
Pad: Thermarest NeoAir – 13.6 oz.
Tent: Big Agnes Fly Creek UL1 – 37 oz.
Stove: Primus TiLite + Titanium pot (.9l) – 9 oz.
Trekking poles: Black Diamond Ultra Distance 10.5 oz. (pair)
Water Purification: Steripen Adventurer – 4 oz.
Total weight:  9 lb. 7.5 oz.  (4.2 kg.)

Gear wise I have to make some small concessions for both cold temps and saving space, so I’m not very close to being ultralight on this trip.  For spring/summer/autumn, a 0˚ C sleeping bag would save some weight.  But from the experience of a night in the mountains on the Swedish – Norwegian border in October a couple years ago, a warmer bag is definitely a safer and more enjoyable option. On the other hand, I’m sure I’ll roast in a few hostel dorms where the punters like to shut all the windows and turn it into an oven of hot stale air and a crescendo of snoring.  On just a hiking trip, I would probably switch the NeoAir pad for a light weigh foam one to save a few ounces.  But foam pads are big and I hate having a bunch of crap strapped to the outside of my bag while walking around cities or hopping on trains.  Plus the NeoAir is way more comfortable anyhow.  Tent is about as light as there is, unless going for a tarp, but when I have to guerrilla camp in sometimes not-so-legit places, I prefer a bit more privacy/protection of a tent.

For staying in cities/hostels, all the camping gear is basically dead weight and unnecessary.  Though generally it’s not a far walk from the train station to the hostel, so it’s not really a problem.  Maybe it’s more of a self-conscious thing; me with a huge old bag and others with small tiny bags of just clothes (and shoes for the stylish peoples).  I always get some weird looks when I have to pull out my tent and dry it over my bunk while everyone else in the dorm is getting fancied up for a night on the town.

Clothing:
Base layer: Patagonia R2
Softshell: Fjalraven
Insulation: Mountain Hardwear Compressor
Shell Jacket: Golite
Shell Pant: Marmot Precip
Pants: MEC lightweight softshell,  REI medium weight soft-shell
shorts
3x t-shirt: 2 cotton, 1 synthetic
3x socks
3x underwear
Gloves
sandals (for hostel showers)
Shoes: Vasque Goretex lined trail runners
Clothing (carry weight):  4 lb.  11 oz. (2.1 kg.)

Again, due to traveling in autumn/winter, I have to pack a bit heavier in the clothing department in preparation for colder temps.  I’ve also had to do a bit of a compromise to cover both hiking and city/hostel life.  If it was a purely hiking trip, I would go a bit lighter with the insulation as I can hike in a light jacket or fleece into below zero temps as long as I’m moving.  But for wandering around cities on a crisp autumn day, I’ll need a bit more insulation.  I chose a hooded softshell jacket over my all time favorite jacket, the Marmot DriClime windshirt, as it fits better with a heavier base layer, the Patagonia R2 jacket.  I figure I’ll have both jackets on pretty much anytime I’m outdoors, so the extra weight shouldn’t matter too much.  While hiking, I shouldn’t overheat too bad in the softshell alone.  I might ditch the rain pants, as I don’t like hiking in the rain anyhow, and with a second pair of pants, if I do get too wet, I can change once at camp.  I carry a super lightweight rain jacket over something a bit heavier that I would wear instead of the softshell as I simply can’t stand wearing hardshell jackets, and will only put one on in a heavy downpour.  I hope I haven’t made a mistake taking trail runners over light boots, but I think I’ll be fine.  Only if there is a considerable amount of fresh snow will it be an issue, so I might run into some problems in the high Tatra mountains, but otherwise, there shouldn’t be too much snow around by mid December (hopefully…).

Other items:
Knife
Headlamp: Petzl Zipka2
Rain cover
Towel
Toothbrush/paste
Biodegradable soap
Earplugs
Hand cleaner

If I wasn’t a photographer, my backpack is actually not too bad for over 2 months of autumn/winter travel mostly in northern Europe.  Next comes the heavy stuff: my camera gear.  Which while I’m trying to pack fairly light and only take a few lenses, it definitely adds some pounds to the backpack.  I’ll talk more about how I carry my camera gear tomorrow.  But basically I keep everything in a normal hiking daypack which can fit inside my larger backpack, as opposed to having a dedicated photo type backpack.  I’ve found this to be a good system in several ways: First, it easily fits inside my larger bag, so while hiking everything is in the one bag and depending on conditions, I may or may not carry my camera in a chest case.  I generally find most photo backpacks to be large and bulky compared to the inside space.  And most aren’t compressible at all due to the thicker padding, so I can’t sort of fold them up to fit is space gets a bit tight.  Second, a hiking daypack is going to be a fair bit lighter (mine is 21 oz. – 600 g.) backpack.  Next, it’s a relatively discreet looking ‘normal’ daypack when walking around cities, nothing that says ‘expensive camera gear inside.’ (and after a few months on the road and the bag gets some nice faded colors going, really looks ghetto then).  It’s more practical for going out on day hikes or short mountain adventures.  Finally, it’s more comfortable to sleep with in hostel beds (yes, I sleep with my backpack). There’s probably a few other benefits as well that I might think of by tomorrow.  But for the benefits gained, I also loose a bit of ease of function with a dedicated photo bag and it’s a bit harder on my gear.  And there are a few companies making photo bags for more adventurous photographers in mind, so I might take a look one of these days and see if there’s anything I could be interested in.

Share:

  • Click to share on X (Opens in new window) X
  • Click to share on Facebook (Opens in new window) Facebook
  • Click to share on Reddit (Opens in new window) Reddit
  • Click to email a link to a friend (Opens in new window) Email
https://www.codyduncan.com/blogimages/2013/07/codyduncan-logo.png 0 0 Cody https://www.codyduncan.com/blogimages/2013/07/codyduncan-logo.png Cody2011-09-13 18:54:592011-09-13 18:54:59Hiking and Travel gear for Lofoten Islands and European Backpacking

Pano Stitching Gone Wrong

July 12, 2009/1 Comment/in Panoramics, Random stuff, Tips and Tricks/by Cody

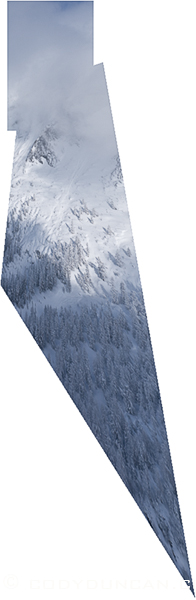
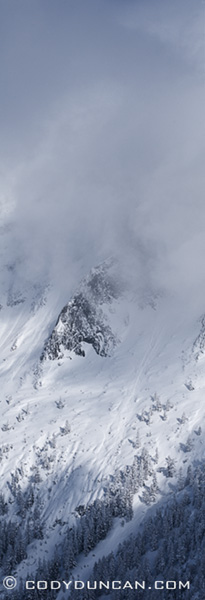
I make most my panoramic photos using photomerge in Photoshop.  Normally it works super good without any problems but sometimes I just have to sit there and scratch my head with what it outputs.  This first photo for example:  3 vertical images with a Nikon 85mm tilt-shift lens.  In other words, it should go together absolutely perfectly, without any distortion or misalignment anywhere.  What happened in photomerge?  A great mystery of life.  All I can think of is that the clouds may have given it some problems.  I just had to use the old fashioned way and combine it by hand.  No problem.

bad-stitch2 mountain-snow-pano

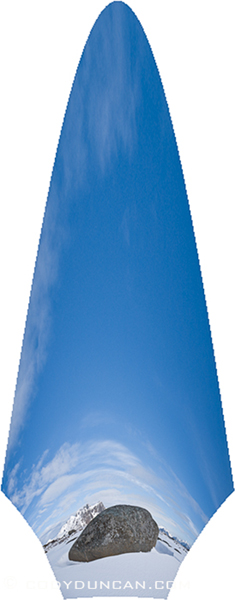
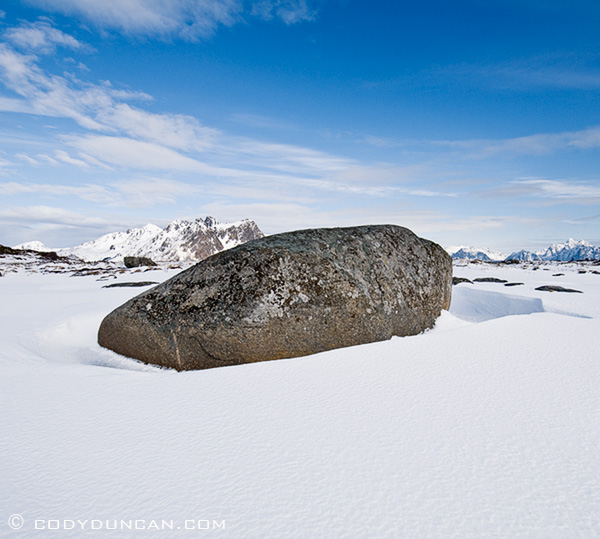
Interesting results on this second photo as well.  And again, it was simple enough to align and blend by hand for a perfect result.

bad-stitch

lofoten-islands-winter-snow

Share:

  • Click to share on X (Opens in new window) X
  • Click to share on Facebook (Opens in new window) Facebook
  • Click to share on Reddit (Opens in new window) Reddit
  • Click to email a link to a friend (Opens in new window) Email
https://www.codyduncan.com/blogimages/2013/07/codyduncan-logo.png 0 0 Cody https://www.codyduncan.com/blogimages/2013/07/codyduncan-logo.png Cody2009-07-12 17:09:152009-07-12 17:09:15Pano Stitching Gone Wrong

Sweet new ringflash!

June 12, 2008/0 Comments/in Random stuff, Tips and Tricks/by Cody

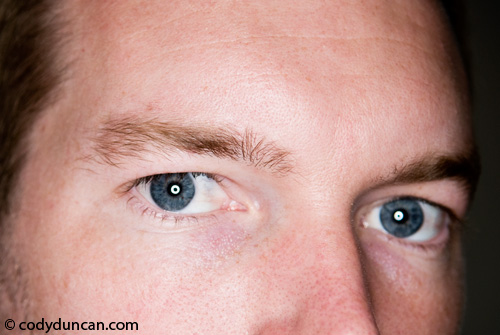
Just got this baby. Sorry to make you suffer, but I only had myself as a model. Can’t wait to test this thing out!

Home made ringflash. Cody Duncan Photography

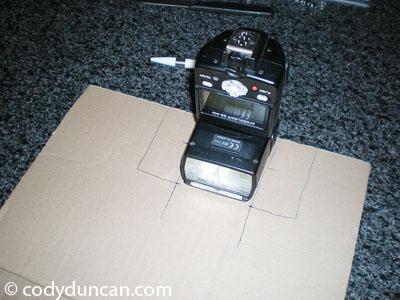
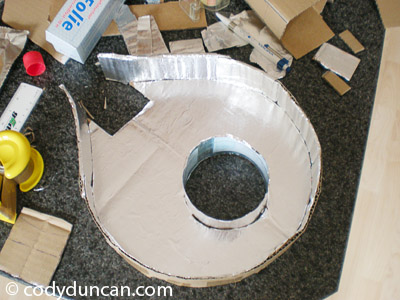
I’m a big fan of the Strobist blog and the ‘do it yourself’ philosophy in general. So in a moment of boredom inspiration this afternoon, I got to work. Only problem was I couldn’t find any duct tape, or else it would be way cooler looking, covered in black duct tape!

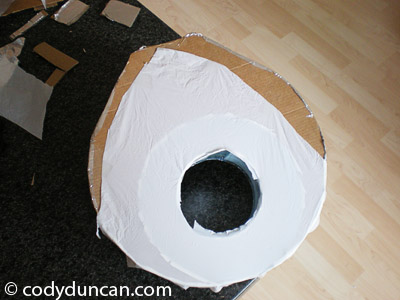
A couple construction photos:

diy cardboard ringflash. Cody Duncan photography

diy cardboard ringflash. Cody Duncan photography

The final product. Ain’t she beautiful!

diy cardboard ringflash. Cody Duncan photography

It’s a bit rough around the edges, but as this is only version 1.0 and I lacked proper tools, I’ll be sure to make a few new designs in the not to distant future.

Share:

  • Click to share on X (Opens in new window) X
  • Click to share on Facebook (Opens in new window) Facebook
  • Click to share on Reddit (Opens in new window) Reddit
  • Click to email a link to a friend (Opens in new window) Email
https://www.codyduncan.com/blogimages/2013/07/codyduncan-logo.png 0 0 Cody https://www.codyduncan.com/blogimages/2013/07/codyduncan-logo.png Cody2008-06-12 07:44:122008-08-05 08:19:17Sweet new ringflash!

Simple Panoramics with Tilt/Shift lens.

December 21, 2007/1 Comment/in California, Landscape, Mostly Photos, Mountains, Panoramics, Tips and Tricks/by Cody

Simple Tilt/Shift panoramic technique.

I like using a Tilt/Shift lens for my panos because the post processing is super simple and I don’t have to carry a separate rotating tripod head specifically for panos. Though I do have to carry a specific lens, my Nikon 85mm F2.8 Tilt/Shift is also a macro lens, so I can sort of kill two birds with one stone. If all is done correctly, I can put an image together in around 1 min or less. When moving elements enter the scene, such as water, that is where the fun starts; I’ll post on this in the future.

Requirements:

  • Tilt/Shift lens
  • Tripod
  • Cable release (not necessary, but helpful)
  • Photoshop

In the field:

Be sure the camera is in manual exposure mode. The camera can be used in either portrait (vertical) or landscape (horizontal) orientation, depending on subject and what you want to do. If shooting horizontal panos in landscape orientation, only 3 shots are necessary, left, center, and right. When shooting vertical panos in landscape orientation, I will usually take 4 shots, as the overlap is a bit thin with only 3, so 4 will give you a bit more to work with if there is any complex blending required (this depends on subject, and in general 3 shots are adequate). You can also experiment with utilizing focal plane shift in combination with panos for some cool and creative results.

(more after the jump)

Read more

Share:

  • Click to share on X (Opens in new window) X
  • Click to share on Facebook (Opens in new window) Facebook
  • Click to share on Reddit (Opens in new window) Reddit
  • Click to email a link to a friend (Opens in new window) Email
https://www.codyduncan.com/blogimages/2013/07/codyduncan-logo.png 0 0 Cody https://www.codyduncan.com/blogimages/2013/07/codyduncan-logo.png Cody2007-12-21 14:39:042008-08-06 00:07:28Simple Panoramics with Tilt/Shift lens.
X Logo X Logo Followon X RSS Feed Logo RSS Feed Logo Subscribeto RSS Feed

Seasons On Lofoten Summer eBook

Seasons On Lofoten Winter eBook

Seasons On Lofoten: Winter

Recent Posts

  • New eBook | Lofoten Islands – Northern Light
  • Padjelantaleden eBook update
  • Ebook update – West Lofoten Hikes 4th Edition
  • New Ebook – Padjelantaleden Hiking Guide
  • Kungsleden South ebook update – 2nd edition – Kvikkjokk to Hemavan

Recent Comments

  • Gerry on rincon dawn
  • Kim on Schmitsch – Smicz
  • Jamie on Hindera Family Origins in Schmitsch, Silesia – Smicz, Poland
  • Patty Regan-Macrina on Schmitsch – Smicz
  • Dušan on Hiking Sweden’s Kungsleden Trail In Autumn

Categories

  • Austria
  • Baja
  • Baltic
  • British Columbia
  • Budapest
  • California
  • Caving
  • China
  • Cities
  • Climbing
  • Colorado
  • Czech Republic
  • Festivals
  • Food
  • France
  • Germany
  • Greenland
  • hiking
  • Historic Places
  • In Print
  • Ireland
  • Italy
  • Japan
  • Lake Powell
  • Landscape
  • Lithuania
  • Lofoten Islands
  • Moorea
  • Mostly Photos
  • Mountains
  • New Zealand
  • Night
  • none
  • Norway
  • Oregon
  • Panoramics
  • Photo Tours
  • Photo Workshops
  • Poland
  • Racing
  • Random stuff
  • Santa Barbara
  • Scotland
  • Stock Photography
  • surfing
  • Sweden
  • Switzerland
  • Timelapse
  • Tips and Tricks
  • Travel
  • Updates
  • Video
  • Wales
  • Washington
  • wildlife

Archives

  • December 2022
  • May 2022
  • July 2020
  • November 2019
  • May 2019
  • April 2018
  • January 2018
  • February 2017
  • January 2017
  • December 2016
  • November 2016
  • October 2016
  • September 2016
  • August 2016
  • May 2016
  • January 2016
  • December 2015
  • November 2015
  • October 2015
  • August 2015
  • July 2015
  • June 2015
  • April 2015
  • January 2015
  • December 2014
  • October 2014
  • September 2014
  • August 2014
  • July 2014
  • June 2014
  • May 2014
  • April 2014
  • March 2014
  • February 2014
  • January 2014
  • December 2013
  • November 2013
  • August 2013
  • July 2013
  • June 2013
  • May 2013
  • April 2013
  • March 2013
  • February 2013
  • January 2013
  • December 2012
  • November 2012
  • October 2012
  • September 2012
  • August 2012
  • July 2012
  • June 2012
  • May 2012
  • April 2012
  • March 2012
  • February 2012
  • January 2012
  • December 2011
  • September 2011
  • August 2011
  • July 2011
  • June 2011
  • May 2011
  • April 2011
  • March 2011
  • February 2011
  • January 2011
  • December 2010
  • November 2010
  • October 2010
  • September 2010
  • August 2010
  • July 2010
  • June 2010
  • May 2010
  • April 2010
  • March 2010
  • February 2010
  • January 2010
  • December 2009
  • November 2009
  • October 2009
  • September 2009
  • August 2009
  • July 2009
  • June 2009
  • May 2009
  • April 2009
  • March 2009
  • February 2009
  • January 2009
  • December 2008
  • November 2008
  • October 2008
  • September 2008
  • August 2008
  • July 2008
  • June 2008
  • May 2008
  • April 2008
  • March 2008
  • February 2008
  • January 2008
  • December 2007
  • November 2007
  • October 2007
  • September 2007
  • August 2007
  • July 2007
  • June 2007
  • May 2007
  • April 2007
  • March 2007
  • February 2007
  • January 2007
  • December 2006
  • November 2006
  • October 2006
  • August 2006
  • July 2006
  • June 2006
  • May 2006
  • April 2006
  • March 2006
  • February 2006
  • January 2006
  • December 2005
  • November 2005
  • October 2005

Stock Image Search

Enter Keyword(s), Subject(s) or Location(s) to search stock photo archive

New on the Blog

  • New eBook | Lofoten Islands – Northern Light December 8, 2022
  • Padjelantaleden eBook update December 5, 2022
  • Ebook update – West Lofoten Hikes 4th Edition May 21, 2022
X Logo X Logo Followon X RSS Feed Logo RSS Feed Logo Subscribeto RSS Feed

Seasons On Lofoten Winter eBook

Seasons On Lofoten Winter - 4th edition

Kungsleden Trail eBook

Kungsleden Trail Hiking Guide

Kungsleden Trail Hiking Guide

Website Search

Search Search

Stock Image Seach

Enter Keyword(s), Subject(s) or Location(s) to search stock photo archive
Scroll to top Scroll to top Scroll to top

This site uses cookies. By continuing to browse the site, you are agreeing to our use of cookies.

OKLearn more

Cookie and Privacy Settings


How we use cookies

We may request cookies to be set on your device. We use cookies to let us know when you visit our websites, how you interact with us, to enrich your user experience, and to customize your relationship with our website.

Click on the different category headings to find out more. You can also change some of your preferences. Note that blocking some types of cookies may impact your experience on our websites and the services we are able to offer.

Essential Website Cookies

These cookies are strictly necessary to provide you with services available through our website and to use some of its features.

Because these cookies are strictly necessary to deliver the website, refusing them will have impact how our site functions. You always can block or delete cookies by changing your browser settings and force blocking all cookies on this website. But this will always prompt you to accept/refuse cookies when revisiting our site.

We fully respect if you want to refuse cookies but to avoid asking you again and again kindly allow us to store a cookie for that. You are free to opt out any time or opt in for other cookies to get a better experience. If you refuse cookies we will remove all set cookies in our domain.

We provide you with a list of stored cookies on your computer in our domain so you can check what we stored. Due to security reasons we are not able to show or modify cookies from other domains. You can check these in your browser security settings.

Google Analytics Cookies

These cookies collect information that is used either in aggregate form to help us understand how our website is being used or how effective our marketing campaigns are, or to help us customize our website and application for you in order to enhance your experience.

If you do not want that we track your visit to our site you can disable tracking in your browser here:

Other external services

We also use different external services like Google Webfonts, Google Maps, and external Video providers. Since these providers may collect personal data like your IP address we allow you to block them here. Please be aware that this might heavily reduce the functionality and appearance of our site. Changes will take effect once you reload the page.

Google Webfont Settings:

Google Map Settings:

Google reCaptcha Settings:

Vimeo and Youtube video embeds:

Other cookies

The following cookies are also needed - You can choose if you want to allow them:

Accept settingsHide notification only